

"DRAFT" might be some errors
Welcome
This guide aims to provide the basic "know-how" to get started with map modding for TDU 1. This guide is primarily aimed at SHKR(Havok road physics) and HMAP(Heightmap). Stuff such as Objects and textures will come later. This guide also comes with a .Blend file that has everything you need in the right format. The mod also includes a macro that allows the converting process to be possible AND can be done by anybody quickly.
What do you need:
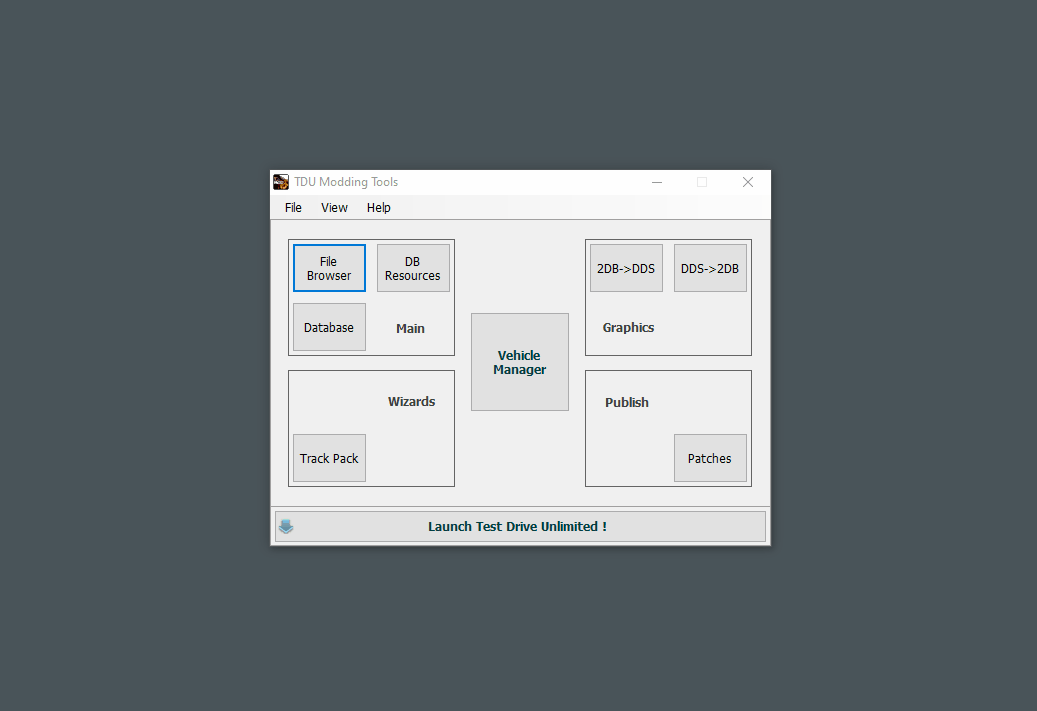
- SHKR Starter
- TDUWE(TDU World editor)
- TDUMT(TDU Modding tools) (If you downloaded platinum, it should be in TDU1\TDU Platinum Toolkit)
- Notepad++
- Blender (3.0.1 or newer)
-
Zmodder 2.2.4(For objects)
- Zmodder 2.2.6(For TDU2 objects)
The files Included and what are they?
The walkthough also comes with some files. located in the TDU tools download section. The mod is called SHKR Starter.
This is basically a start-up .Blend file to get you started with TDU map modding. TDUWE only accepts a very specific set of names in an organised hirachary, in the Z=Y axis format. This is extremely hard to get right and the results will be pretty much the same. So to save the headache, I’m just including this.
and of course, Blender is unable to export this properly. To counter this, what I Included is a Notepad++ macro I improvised months ago. This macro is easy to use and makes a task that normally takes hours into a one-click and you're done deal. Plus it can process hundreds of .daes in a matter of minutes.
The .Blend file
Contains import SHKR contents, modified to follow a path and arrayed. This .blend file also has an upscaled grid(452) to match the sector layout of the map for joining imported sectors together.
TDUWE Can only export with squares. If you try to export rectangles or anything that’s considered long in shape, it will just think it’s a square, and the physics won’t work as expected. This is why the original TDU SHKR can't be reimported back to TDU using TDUWE.
How to Open.
Launch Blender and open it.
You can also append the collection into your own projects.
The Shortcuts.xml
This is the file that contains the macro for Notepad+. Blender exports an .dae that just doesn’t work with TDUWE and this macro changes the script so that it’s compatible with TDUWE.
This isn't a normal macro; it uses regular expression search-and-replace syntax. All you have to do is press a button and the script will sort everything out.
I will go over in the walkthrough below.
How to install the xml file.
Type "%AppData%\Notepad++\" in your explorer browser.
Replace/copy the Shortcut.xml there.
Lets start!
We are going to make the pathways of one of the golf courses behave like tarmac.
This means we need to:
- Export all the sectors contents into a folder.
- Extract the heightmap and apply the texture to it so that we can see what we are doing.
- Create/move the path so it follows along the dirt trail.
- Finally export the CONVEXEs and convert it to run in TDUWE again.
- Update the sector.bnk so it can actually have road phyisics.
Using TDUMT to export a sector
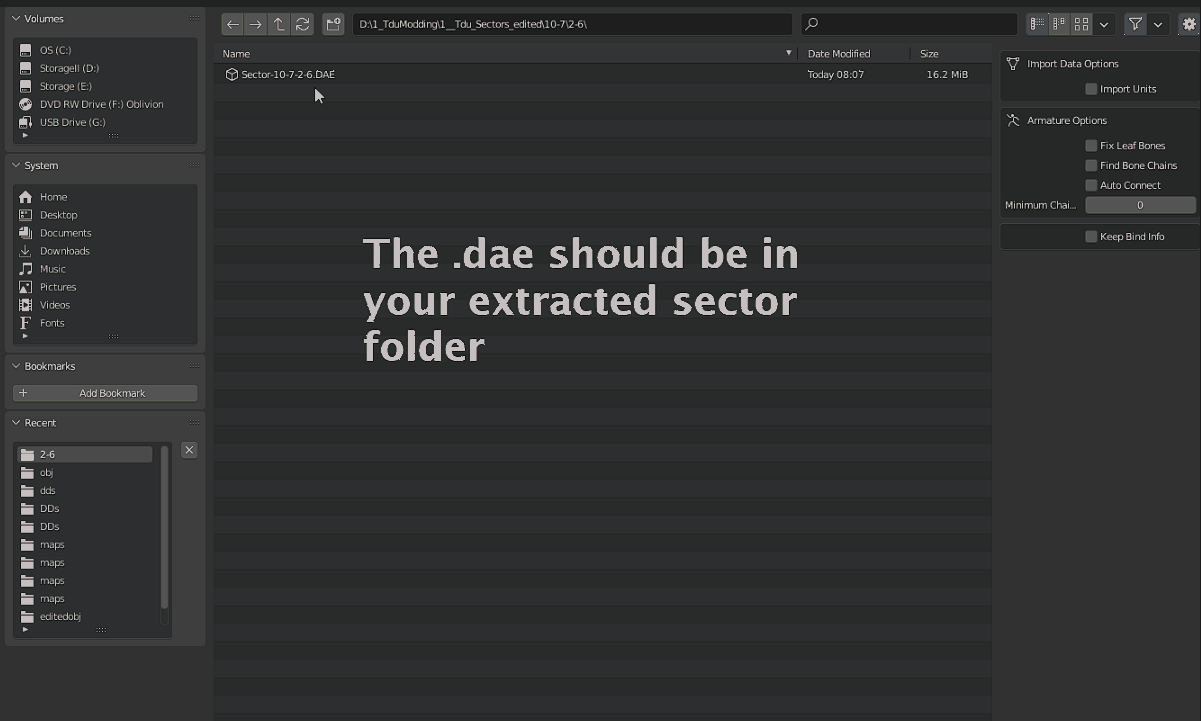
1. Use TDUMT to open up Area 10-7. Sector-10-7-2-6. extract all contents somewhere.
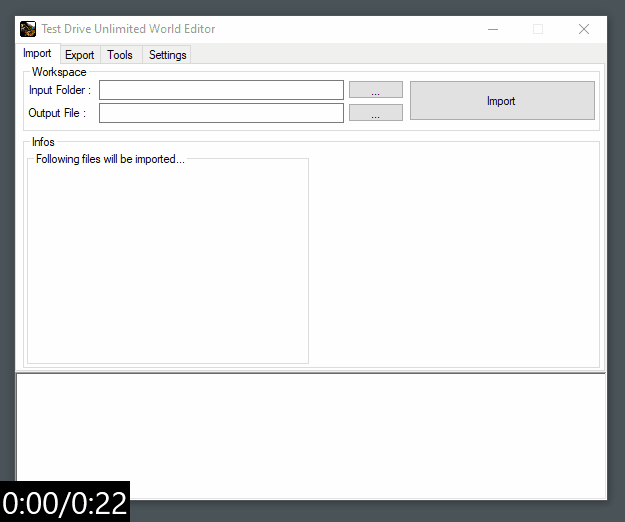
2. Use TDUWE to import some HMAP. Make sure you are in the import tab and open up the file you created.

3. Uncheck objects and Import.

4. Open Blender
5. Open the .Blend file that came with the walkthough. SHKR Template.blend
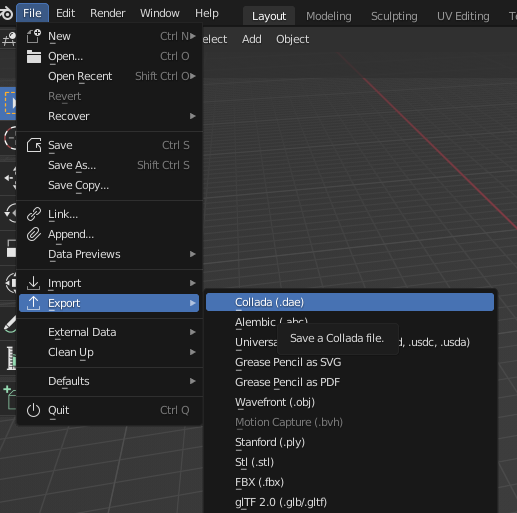
6. Go to File, Import, COLLADA(default)(dae)
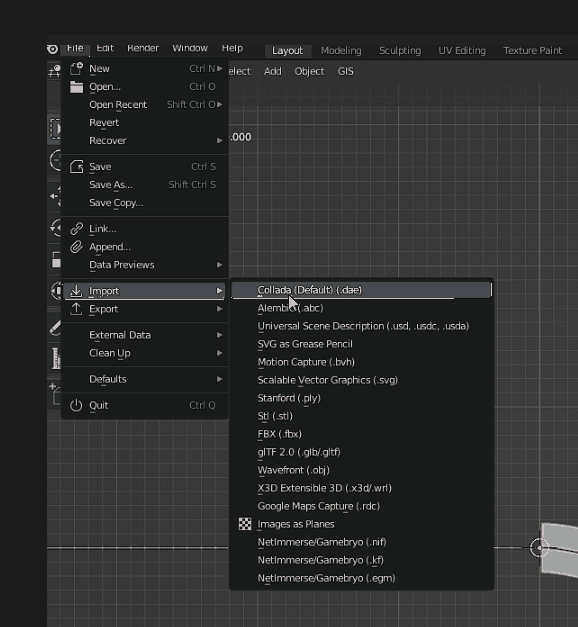
5. Import using default settings.
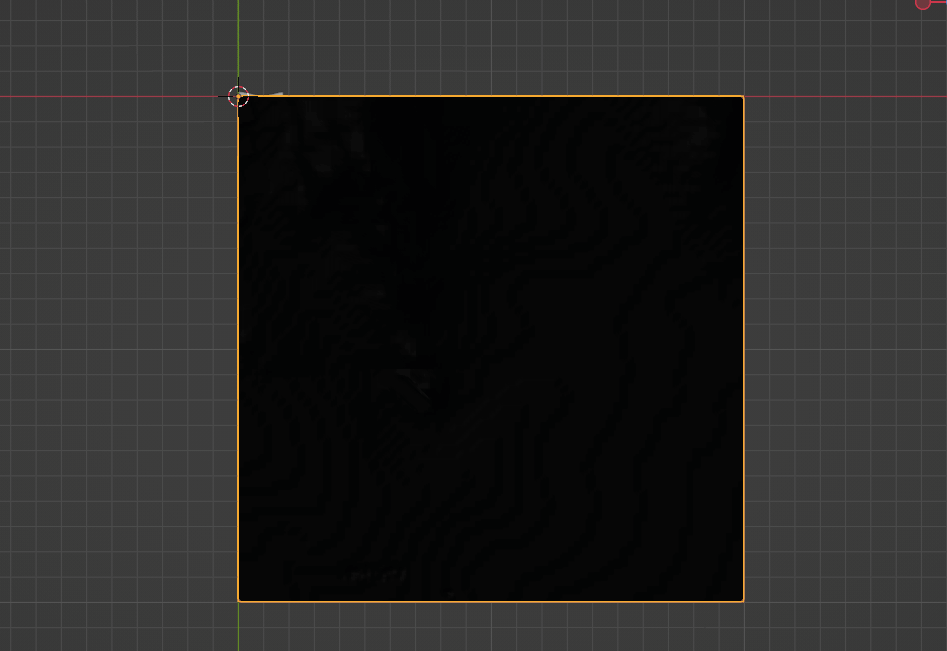
6. You should see something like this.
Getting the Colourmap for the HMAP
Okay, now you need to see the texture that the Hmap uses for the pathways.
1. Open TDUMT.
2. open "2DB->DDS"

3. Open up the sector file that you created.

4. Select Sector-10-7-2-6-c. Convert 2dm to DDS by clicking GO. The DDS will be in the extracted folder.
5. Jump into Blender. Select HMAP. Go into material properties. Locate the DDS file you created. Open it. You won't see anything unless you click on the materials view
Using TDUs gridsystem
May seem overkill for one sector, but for projects that has lots of sectors, this is essential.
1. In Blender. Check grid snap is on This will make the sectors snap in place like a jigsaw.

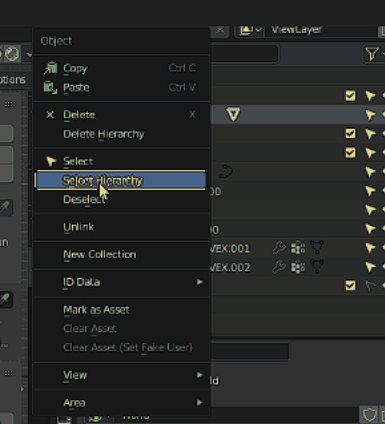
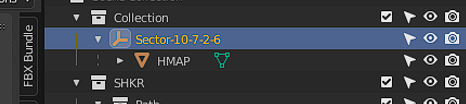
2. With the grid snap on. Select an entire sector by going into the outliner. Right click on a sector and select hierarchy
3. With the whole thing selected. Hit G while facing down(Numpad7). This will move everything based on the layout used for the game.
It's very important that everything is selected for moving sectors. Leaving something behind could be catastrophic!
4. For object placement within a sector. We go into "edit mode"(tab) and select all the vertices of the object to be moved/altered.
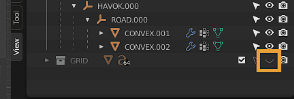
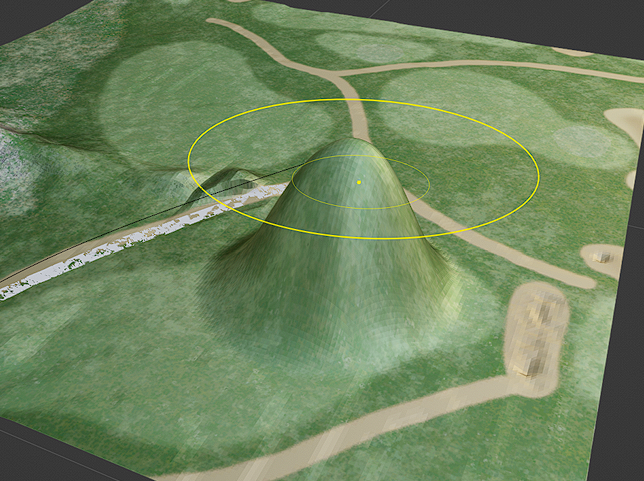
5. I've made a numbered grid model for my own mapping. Its located in your outliner(hit the Eye icon)
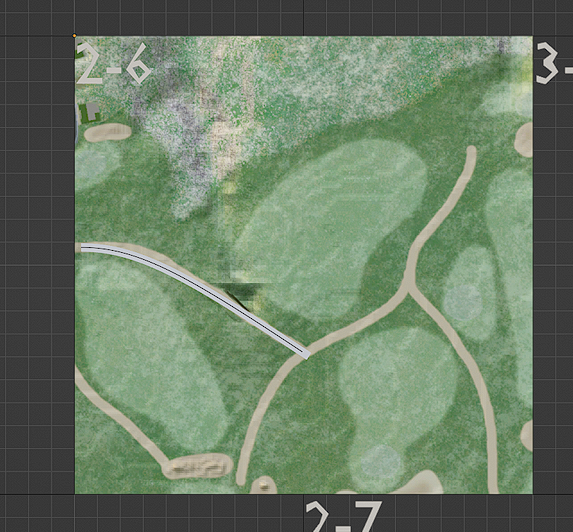
6. Feel free to position your sector to the correct square. In this example, it would be 2-6.

Editing RSHK
I've include my own personal SHK Hiarechy in the outlinder. TDUWE has a lot of trouble exporting everything apart from a square and after many months of testing. This the best example. If you have a object something more complex has phyisc
1. Locate the path in the outliner, and edit so that it follows the golf path roughly.
2 You can do this anyway you see fit. For this exercise, i'm going to use a shrinkwrap modifer to wrap the CONVEX to the HMAP. Keep in mind you need to make your CONVEXES physicaly above the HMAP.
2. select the two CONVEXES. Go into modifiers. look for the array modifier. Adjust it to the desired length. Once happy, apply the modifier. Control P to apply the same modifiers to the other one.
3. Apply array modifer. select the other one and apply modifer. Now to make these into seperate objects. Ctrl P, seperate by loose parts.
Time to export some Physics
This used to be a really audious task that would take hours. Now it should only take a moment.
1. In the outliner rename sector-0-0-0-0 to sector-10-7-2-6(very important not OCD:P)(The physics for that sector will not work if its not named correctly) To do this select the sector and hit F2.

2. It’s ready for export. Select the entire sector hierarchy. File, export, COLLADA.

3. Check Selection only.
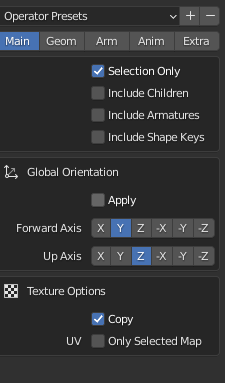
4. Check apply Modifers
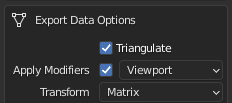
5. Uncheck "Use object instances" and "Use blender profile"
Check "Sort by Object Name"

6 Save it in a good location and hit Export!
7. Open up the .dae file with Notepad++ Make sure it’s the only file opened(This script is designed to process multiple files!)
8. Go into macro. Select "R.shk_convert_by Beight"
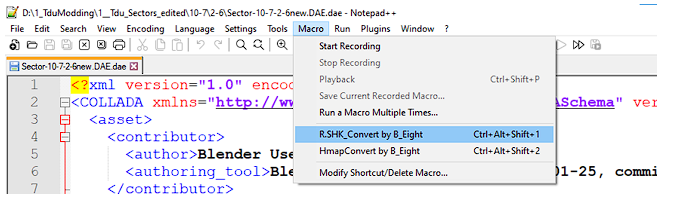
Say Ok to everything.
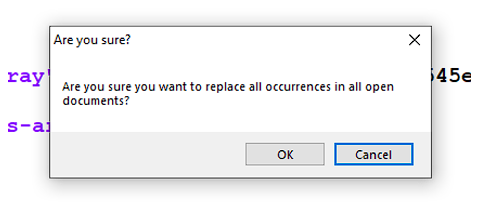
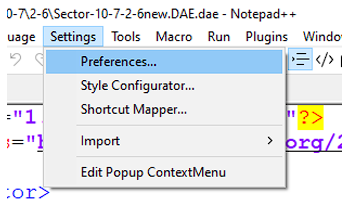
(Optional). go to settings/preferences. in the side selection menu, select "searching" and uncheck "Confirm replace all in all opened documents"

9. Save everything and thats it ready for TDUWE
10. Open TDUWE again. Switch to export tab. Find the edited .dae and hit export.
You got the physics, but the sector dousn't. You need to replace the sector.bnk with one that has R.SHK.
1. Go into your Euro/Bnk/Level/Hawai/Area-10/Area-10-7 using your file browser.
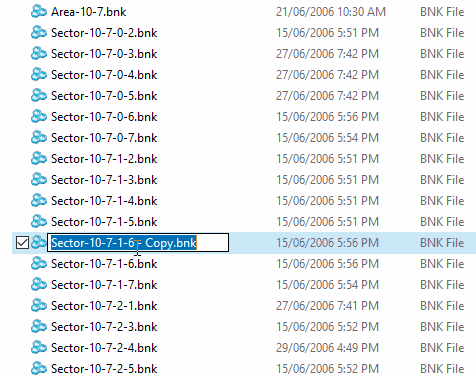
2. Copy Sector-10-7-1-6.bnk. Paste it in the same folder.
3. Delete sector-10-7-2-6.bnk(You should still have the orginal files. The ones you extracted eailer)
4. Rename "Sector-10-7-1-6 - copy.bnk" to "Sector-10-7-1-6.bnk"
5. Switch back to TDUMT.
Now, this .bnk has the R.SHK, but all the files belong to Sector-10-7-1-6.
Replace all these files in TDUMT According to what they are.
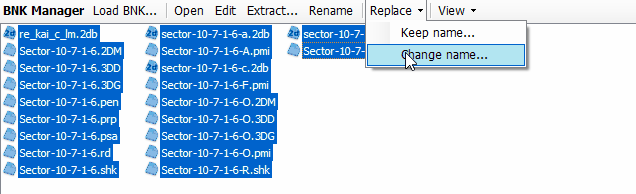
For example
“Sector-10-7-1-6-a” replace with “Sector-10-7-2-6-a”
“Sector-10-7-1-6.rd” replace with “Sector-10-7-2-6.rd”
Don’t worry if all files can’t be replaced just continue replacing the files.
You can rename the “sector-10-7-1-6” files to “sector-10-7-2-6, " but it doesn’t affect these files' functionality.
Now let’s replace that R.SHK!
Select “sector-10-7-1-6-R.SHK” and replace it with the one you created. TDUWE always creates an “export” file in the same folder the.Dae file. So look in there.
Now let’s see if this worked. Open up the game and go to the golf course.
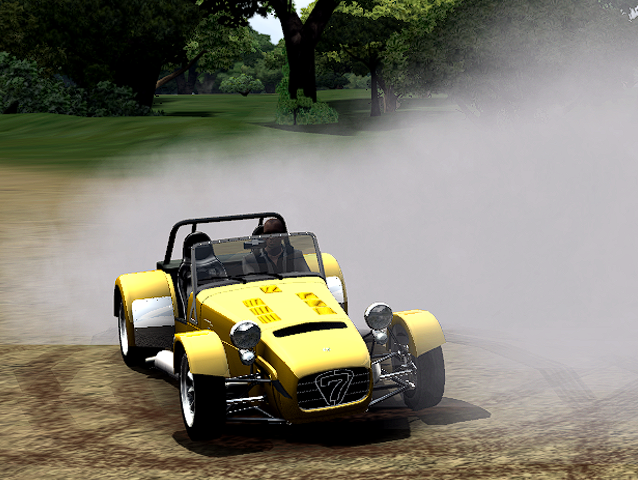
Okay! It’s a little bit bumpy, that’s because it’s based on the HMAP. So I’m going to show you how to edit the terrain.
Editing the HMAP
You should already have HMAP already in Blender.
1. Personally, I like to edit my HMAPS by sculpting them. But you can do it in any way you want.
Please remember HMAP vertices can only go up or down.
If you are sculpting its very useful to lock your axis. To do this you need to
1. Go into sculpt mode
2. Go into Tool in the side menu. Next to the outliner.
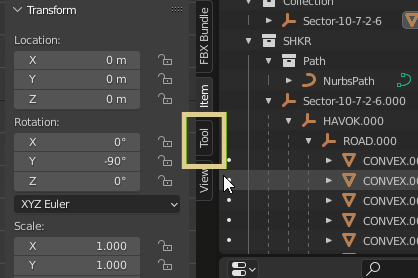
3. Go down to symmetry. Expand it.
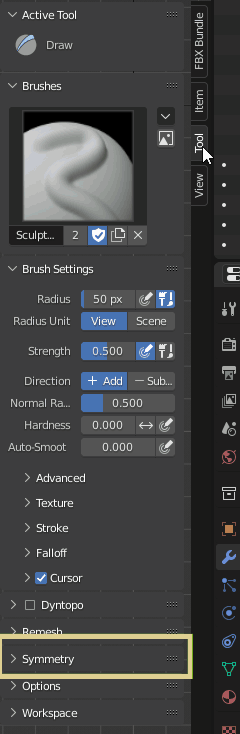
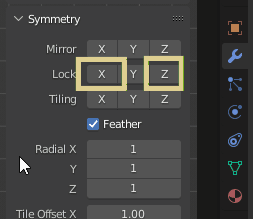
4. Check X and Z. Also please note that TDUWE Produces these with weird rotational axis. For example, Z axis is Y axis for these models.
5. Happy sculpting, personally I like the grab tool, but you can make anything you want.
Exporting the HMAP
You're happy with the changes now its time to get it into the game.
You will need to rename the hierarchy names to have .000 after them. This is because my script will get confused if given names that don’t have a “.###” after them. The reason why its done this way is that its very likely you’ll use multiple versions of the same object for the same sector and this just makes modding a little bit easier.
1. Change “Sector-10-7-2-6” to “Sector-10-7-2-6.000” Do this for the HMAP as well.

2. Select hiarachy the sector.(Select the entire thing)
3. In Blender. File, export, collada.
4. Same settings for the SHK. Make sure these are the same.
5. As always name your dae the sector its based on. “Sector-10-7-2-6.” You can either create a HMAP folder for these or just name it HMAP. Just don’t let it replace your SHK.dae.
6. Like SHK. Open the .dae in notepad++
Please note. Hamp.daes are considerably more CPU intensive than SHK.daes. You might want to not scroll down if your PC is slow.
7. Go into macro, and find "HmapConvert by B_Eight"
This script may take some time...
8. Once finished. Save all.
9. Hop onto TDUWE,
find the recently created .dae and export it, like you did with SHK. 10. You now have 3 new files: .3dg, .3dd, and .2dm.
- 3dg - Models, UV, meshes
- 2dm - Texture list
- 3dd - Hirachy information
11. Hop onto TDUMT and go into the sector-10-7-2-6 folder again
12. The files without the "O." These files are the HMAP
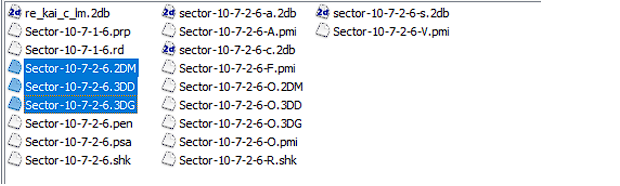
13. Replace the .3DG. You can replace the 3DD file if you want. Dont replace 2DM.
You should now have a new Heightmap. Launch TDU and go to the golf course to see your changes.


Recommended Comments